

PV installation:
PV Installation Process Description
The installation of photovoltaic (PV) modules involves a systematic sequence of activities that ensures the safe, efficient, and high-quality assembly of solar panels onto pre-constructed mounting structures, connecting them into functional electrical arrays.
- Pre-Installation Preparation
- Material Inspection: Verify receipt of PV modules, mounting structures, fasteners, and accessories against delivery notes and specifications. Check for physical damage.
- Layout Verification: Confirm string layout, tilt angles, and orientation (typically facing true south in the northern hemisphere).
- Tool Preparation: Ensure availability of torque wrenches, hand tools, lifting devices, grounding test kits, PPE, and lifting equipment.
- Mounting Structure Installation
(Assumes pile-driven or concrete foundation is already complete)
- Erect mounting structures as per approved shop drawings.
- Verify structure alignment (verticality and level) using laser level and spirit level.
- Secure all bolts and fasteners to specified torque values.
- Perform visual inspection of structural components for corrosion or defects.
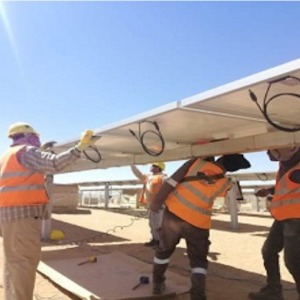
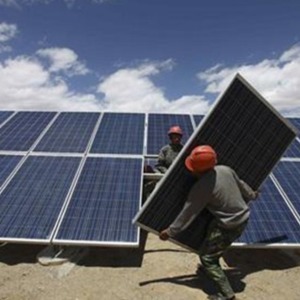
- PV Module Installation
- Module Handling: Carefully lift and position modules to prevent glass breakage or micro-cracks. Avoid dragging across surfaces.
- Fixing Modules:
- Align modules as per the layout plan.
- Fasten modules using certified clamps/brackets, maintaining specified gaps between modules (thermal expansion spacing).
- Torque all module fasteners to manufacturer specifications (typically 8–12 Nm).
- Grounding: Connect module frames to the structure’s grounding system using grounding lugs and bonding jumpers where required.
- Electrical Interconnections
- String Connections:
- Connect PV modules in series to form strings using MC4 or equivalent connectors.
- Ensure correct polarity and voltage levels match design parameters.
- Combiner Boxes:
- Route string cables (DC) to combiner boxes mounted on the mounting structure or dedicated poles.
- Use UV- and weather-resistant cable ties and conduits for cable management.
- Earthing:
- Connect module frames and structures to the earthing system using copper wires or earthing tapes.
- Verify continuity and resistance of the grounding system (target <10 ohms or per spec).
- Testing and Commissioning
- Pre-Commissioning Tests:
- Perform Insulation Resistance Test (megger test) on string cables.
- Verify open circuit voltage (Voc) and short circuit current (Isc) of each string.
- Confirm polarity and check for any mismatch in connections.
- Functionality Check:
- Monitor system output after energizing (if connected to inverter/SCADA).
- Ensure all connections are tight and safe, with no exposed live terminals.
- Document all test results and hand over for QA/QC approval.
- Cleaning and Final Inspection
- Clean modules with soft water and lint-free cloths (if dusty).
- Conduct final visual inspection for defects, loose connections, and physical alignment.
- Mark strings and array sections with permanent labels for future maintenance.
- Safety and Environmental Considerations
- Workers must wear PPE: gloves, helmets, safety shoes, harnesses (for elevated work).
- Implement lockout/tagout procedures during electrical work.
- Ensure all work follows relevant standards (e.g., IEC, NEC, local electrical codes).